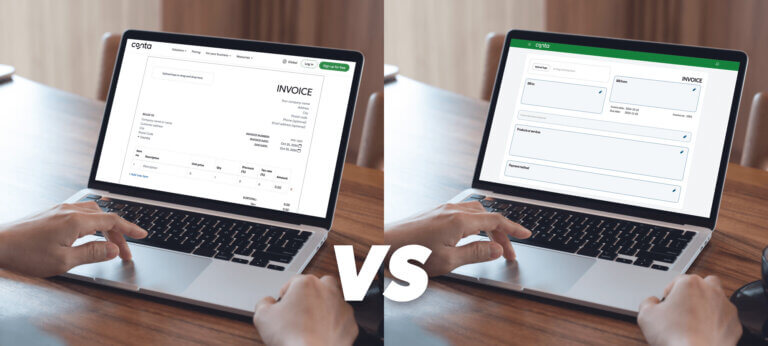
How to generate an invoice using an invoice generator

With an invoice generator, you can make an invoice for free on your phone or laptop. It’s easy to use—we’ll show you how to generate an invoice using an invoice generator.

Post-thumb

With an invoice generator, you can make an invoice for free on your phone or laptop. It’s easy to use—we’ll show you how to generate an invoice using an invoice generator.

To generate an invoice using an invoice generator, you just fill in information about you or your business, your client, and the products or services you’ve sold. You can even upload your logo to make your invoice more easily identifiable and to strengthen your brand.

In this article, we’ll show you how to generate an invoice using the free invoice generator from Conta

Want your invoice to be generated almost automatically?

If you use free invoice software, your information, your clients and your products and services are saved. That means your details are prefilled, and you can add clients and products to your invoices with one click. 

Invoice software will also notify you when an invoice is overdue, so that you can reach out to customers and get paid faster.

1. Enter your details and the clients details

We’ll use the example of a photographer who’s taken some headshots for an actor. 

At the top of the invoice, you enter your details, or your business details, if you run your own business. 

The business and client details on an invoice generated with the free invoice generator from Conta

In this case the business details are:
James Sharp Photography
40 Snap Street
Brookside 1072

You can also add your phone number and email address, to make it easier for your clients to contact you. 

Then you enter the name of your client, in this case: 
John Smith, 11 Clear Street
Claymont
5340
United States

 If it’s a business, you add the business name and the business address instead. 

Invoice numbers are a legal requirement. Your invoices must be numbered in ascending order, without any gaps in the sequence. If this is your first time sending an invoice, you can leave it as the default INV 1001. Your next invoice should be INV 1002. If you’ve invoiced previously, you need to check the number on your last invoice, and set this number one higher.

In most cases, the invoice date should be today’s date. 

The due date is when you want to get paid by. There are many different payment terms, such as 7, 14 or 30 days. These are often called net 7, net 14 and net 30. Usually, you shouldn’t give the client more than 30 days to pay the invoice. If you do, you risk damaging your business’ cash flow, because you won’t get paid for a long time.

Remember to upload your logo by clicking on the top-left field or dragging and dropping. This will help you build a strong brand.

2. Add the products or services you’ve sold

The products and services on an invoice generated with the free invoice generator from Conta

The next step is to add the products or services you’ve sold. Make sure to describe the product or service so that it’s clear what you’re invoicing for. In this case, the description is ‘headshots’, but you can make it more specific than this. Then add the unit price and the quantity. 

If you’ve agreed on a discount with the client, you simply add the percentage. Then add the tax rate. The invoice generator will calculate the tax and the total for you.

If you’re using inventory management software, you can set the item number on your invoice to match. This makes it easier to manage your stock. If you don’t have inventory management software, you can leave the item number as 1. 

Pro-tip: Save your products and services for later

With free invoice software, your products and services are saved. That means you can easily add them to your future invoice without having to retype the description, unit price and tax rate. 

You can also go to your product catalog to see how many times you’ve sent an invoice for a certain product or service, and how much you’ve invoiced for. 

3. Add how you want to get paid

It’s important to include your payment details, as this will let your clients know how to pay you. You can enter your bank account details, a link to a payment gateway, or any other payment method you need. This is what we’ve done in the example:

The payment details on an invoice generated with the free invoice generator from Conta

Remember to include SWIFT code and IBAN number, if this is required. 

Optional: Add terms and conditions

You can also add terms and conditions to your invoice. This can either be information about warranties, late payment fees or information about your returns policy. Here’s an example: 

The terms and conditions on an invoice generated with the free invoice generator from Conta

It’s also a good idea to thank the client for doing business with you. Research shows that including polite phrases like “please” and “thank you” means you get paid 5 percent faster

This is what the final invoice looks like:

An invoice generated with the free invoice generator from Conta

Is an invoice generator the best way to make an invoice?

While an invoice generator can be a good solution if you need to send one or two invoices, we recommend trying invoice software if you’re going to be invoicing a lot. Studies show that businesses can save €3 and 30 minutes per invoice by using a digital solution, such as free invoice software.

That’s because invoice software stores your information. When you go to create an invoice, your details and your payment method is prefilled. Clients, products and services are saved each time you send an invoice, so that they can be added to your future invoices with the click of a button.

Invoice software also makes it easier to manage your invoices and keep track of your cash flow. You’ll get notified about overdue invoices, and you can see how much you’ve invoiced for and who your biggest clients are. We’ve compared the pros and cons of using an invoice generator versus using invoice software.

Create free invoices now